

In the Productised system there's 3 different types of AI products you can build.
1. AI Products with Standard Output (Covered in this article)
2. AI Products with Dynamic Multi-Page Output
3. AI Products with Dynamic Multi-Page Output & structured output variables.
For products of greater complexity which need really nuanced output, our platform also supports prompt chaining - which is discussed later in this section and global custom variables which enable you to populate important details such as your company name easily throughout your products.
This article is all about teaching you to build simple products with standard output. When we refer to 'standard output' what we're essentially referring to is straightforward text-only output that the user can easily scroll on their device of choice. It's a great choice for simple lead magnets and quizzes.
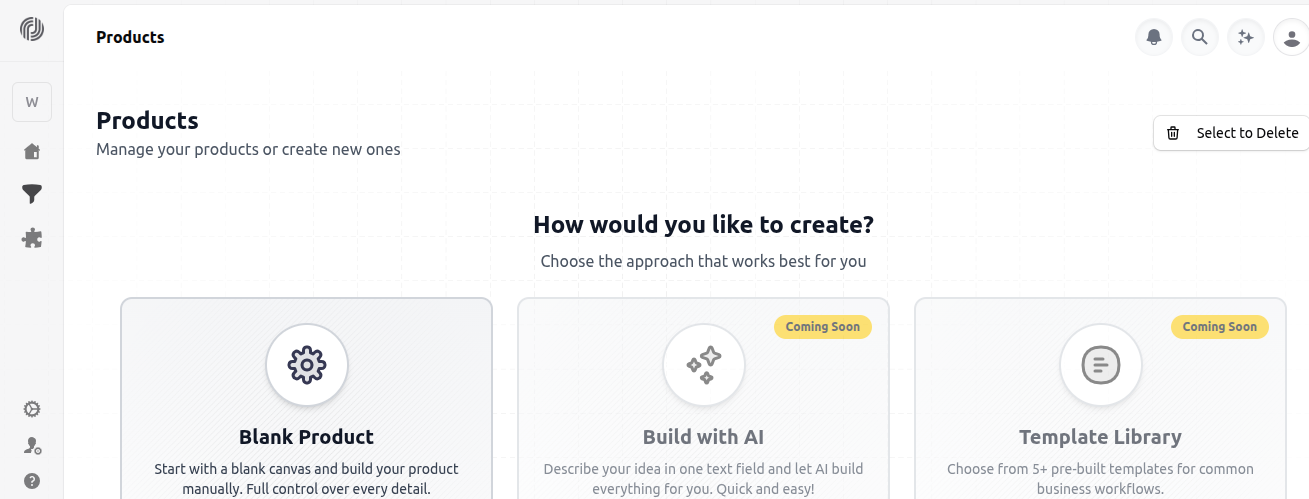
To begin the building process, select 'Blank Product' from your home dashboard in the 'Products' section of your account. Get to Products by selecting the funnel icon from the sidebar. Note that the 'Build With AI' and 'Template' features are coming soon.
Step 1: The Form Builder
To build a product like this, you need to start with the form builder. This is where you create the form experience which your end users will interact with.
The form builder interface is very easy to use. All you really need to configure upfront is (i) the question name (ii) the question title (iii) the question type.
1. The question name field. The question name field is important because it is where you define the question input as a variable which will be used to provide context to your AI prompts later. It's important to use correct variable naming convention. Use lower case and underscores for instance target_audience and not Target_Audience

You open the question settings tab to gain access to the question title and name fields, as you can see in the image arrow below:
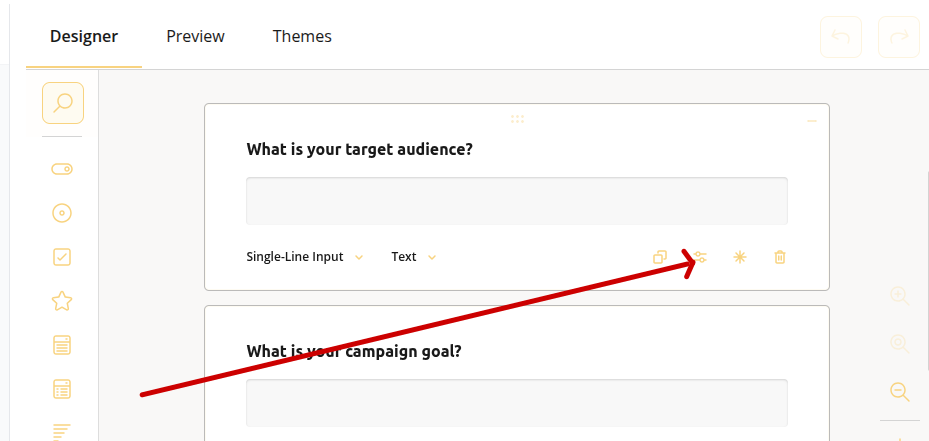
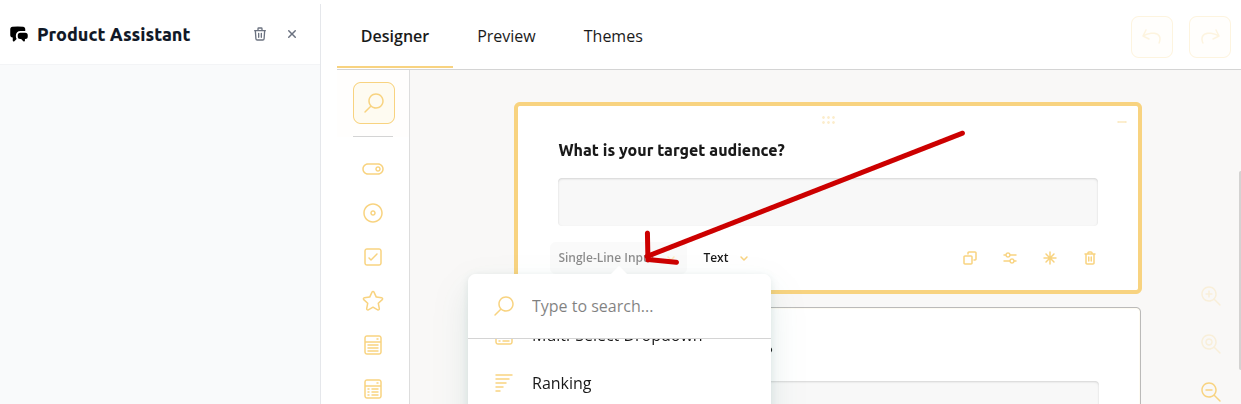
2. The question title field and question types: The question title field is simply where you give the question a name such as what is your target audience? Then you have the question types. The most common question types you will use will be Yes/No (boolean), Rating Scale, multi-select drop-down and short/long answer. Other question types such as matrix are more complex. We cover these elsewhere in this knowledge base. Click 'Single-line-Input' below the question box to change the question type by scrolling through the options. Note that single-line is the default.
One other thing you might like to do here is set placeholder text. This appears in the box before the user types their answer. Return to 'settings' and then enter your placeholder text in the 'placeholder text within input field' box.
Step 2: The Workflow Builder
The next step is to create the workflow which powers your AI Product in the backend. Every workflow begins with the landing page node.
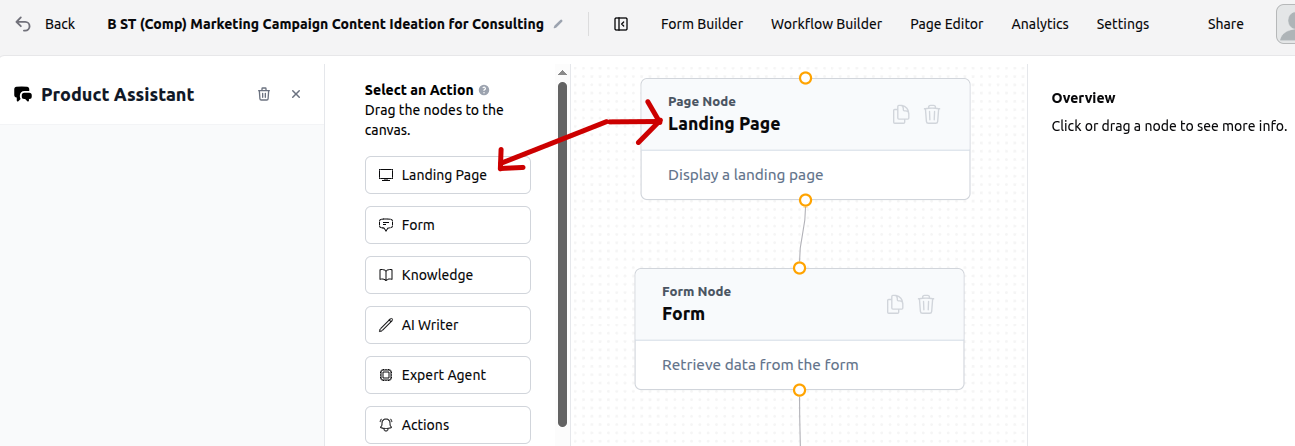
Select the landing page from the node menu and drop it onto the canvas. The next step is to click the node on the canvas, this will open up the properties menu on the right that enables you to create the actual page.
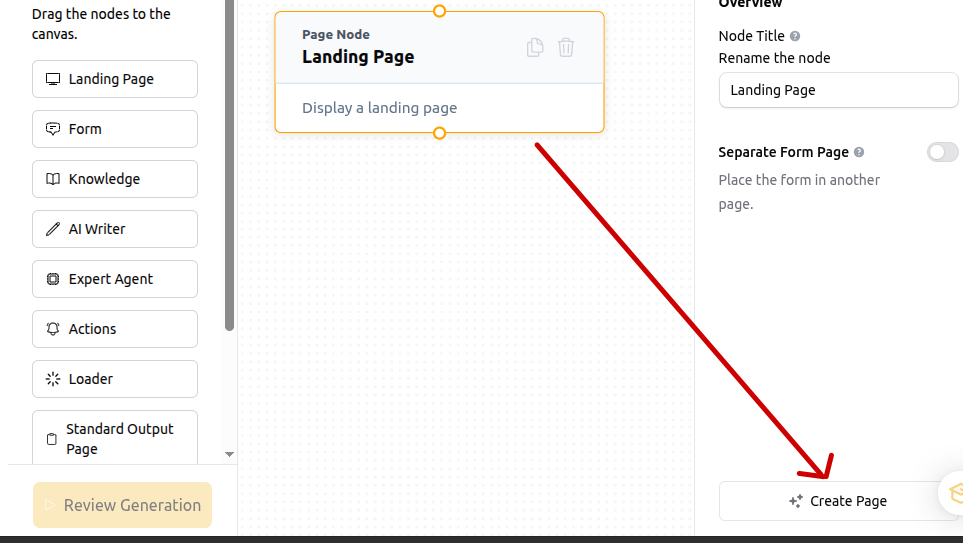
This brings you into the page builder environment for the first time which you can see in the image below
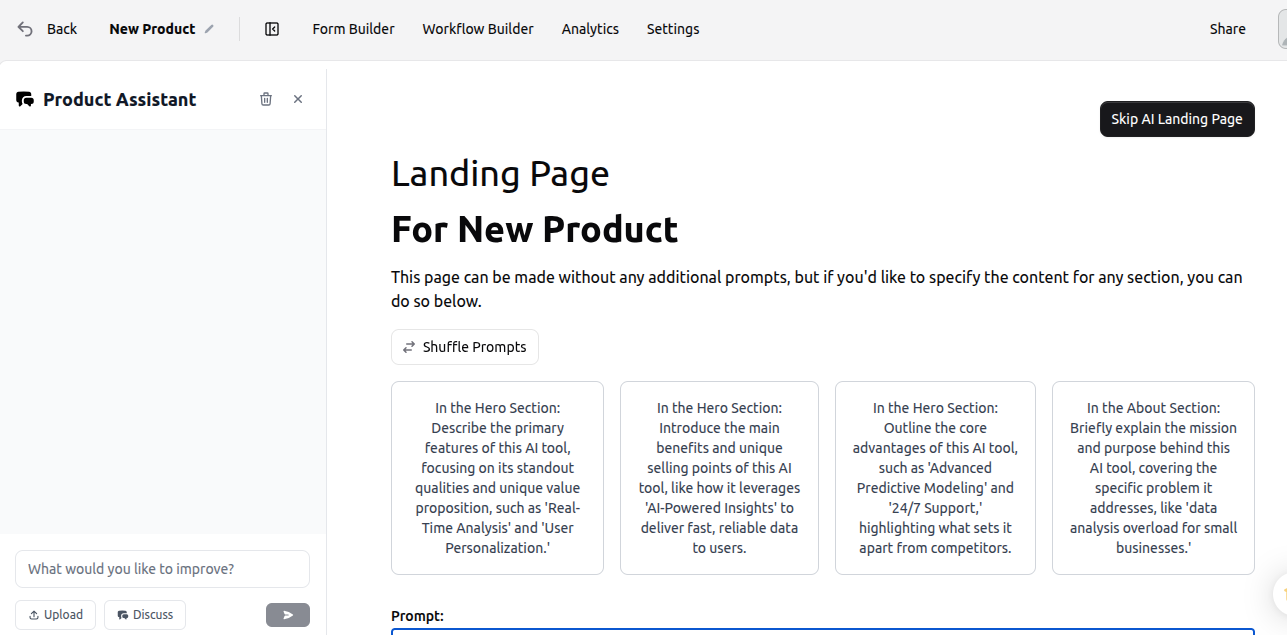
As you can see there is the option to create a landing page with AI. You can provide the AI with a simple prompt like 'design me a landing page with a hero section and two further content blocks for body copy and images' and you will receive a done-for-you landing page which looks sharp from the start.
For this tutorial we will select 'skip AI landing page' and then create the page manually using the 'blank' template. This brings you into the builder environment where you can click the '+' icon to drop some landing page elements onto the design surface.
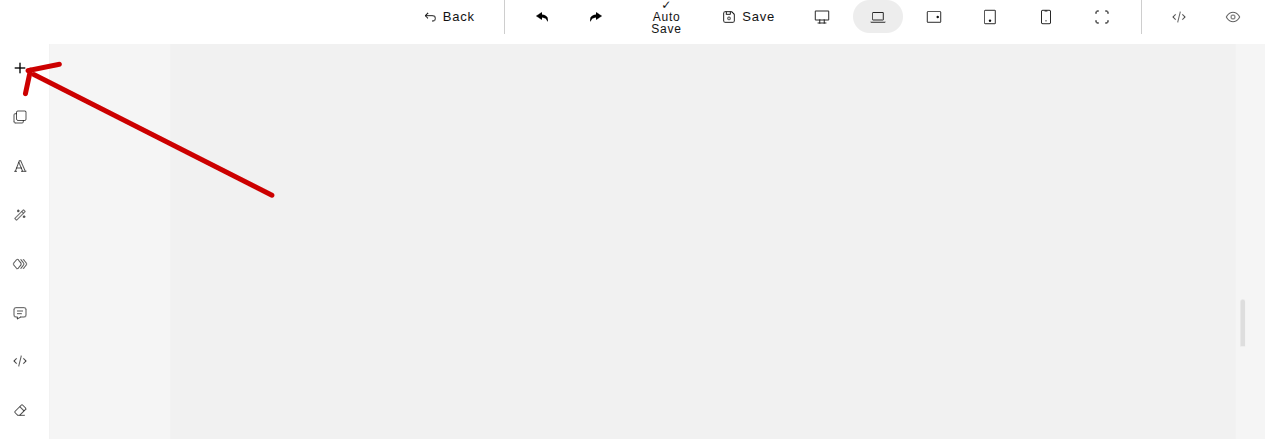
For this example we're just going to focus on adding a form block, but there's plenty of other options you can select from the sidebar, including different content blocks, photos and other elements. The page builder is 100% drag and drop so there's no need for any serious technicalities.
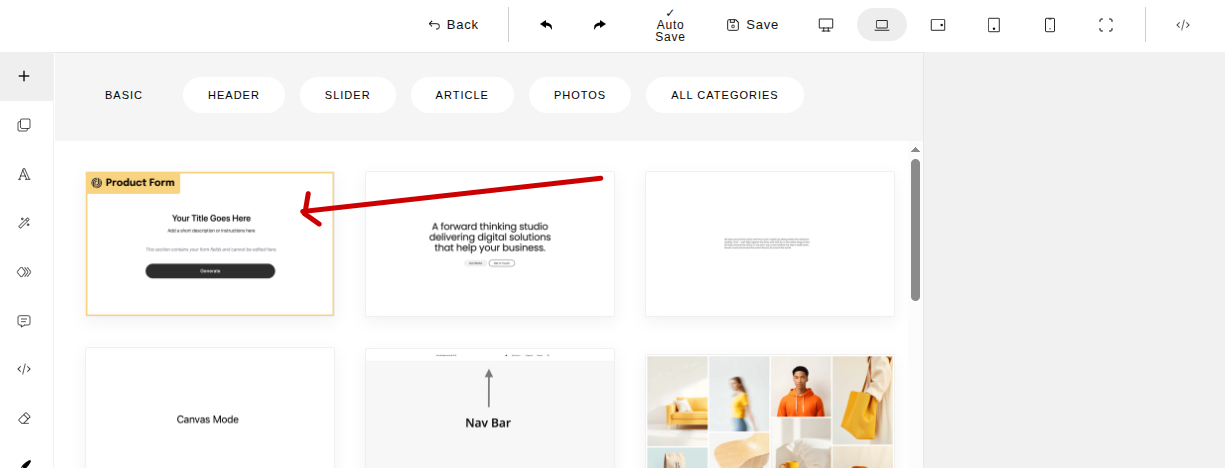
For improved visual presentation we recommend deleting the title field from the form block but it's entirely up to you.
Step 3: Configuring the Product Workflow
Now you need to add all the remaining nodes that make up the workflow to the canvas, then connect them together using the connector tabs. For a basic workflow with standard output, you need in this order: a landing page node > a form node > an AI Writer Node > the loader node and of course the Standard Output Node.

The main focus for completing your workflow from here is the AI Writer node. This is where you will create the prompt that will instruct the system to produce your standard output.
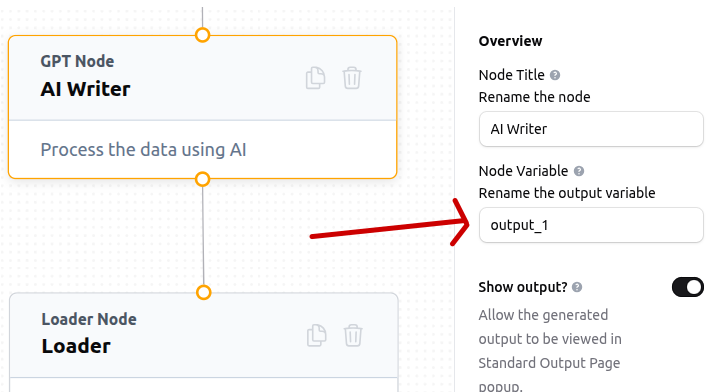
(i): Naming and model selection: Name the node output variable, in this example we have called it output_1 and then select the AI model you want to use for generation of the output. Common options available here include GPT 4 Turbo, GPT-4 and GPT 4o.
(ii): Create the prompt and assign variables from the form
The next step in the process is the creation of the AI prompt which will need to incorporate the question name variables you created in the form earlier, such as target_audience. Here's an example prompt sequence:
Based on the {input}:
Role: You will assist me in summarizing lengthy documents into clear, concise, and accessible summaries.
The document type is: {form:document_type}
Focus on extracting and highlighting the most important key points:{form:key_summarized_points}, ensuring that no critical insights are overlooked.
Tailor the summary for the target audience:{form:document_target_audience}, adapting language, tone, and level of detail to their needs and expectations.
Ensure the final summary adheres to the desired length: {form:desired_length}, striking the right balance between brevity and completeness.
Output Requirements
Present the summary in a structured format (e.g., headings, subheadings, or bullet points) to enhance readability and comprehension.
Include a brief executive overview at the start to capture the essence in one or two sentences.
Organize the content logically, grouping related points for flow and clarity.
When appropriate, add actionable insights, implications, or recommendations derived from the document to maximize value for the reader.
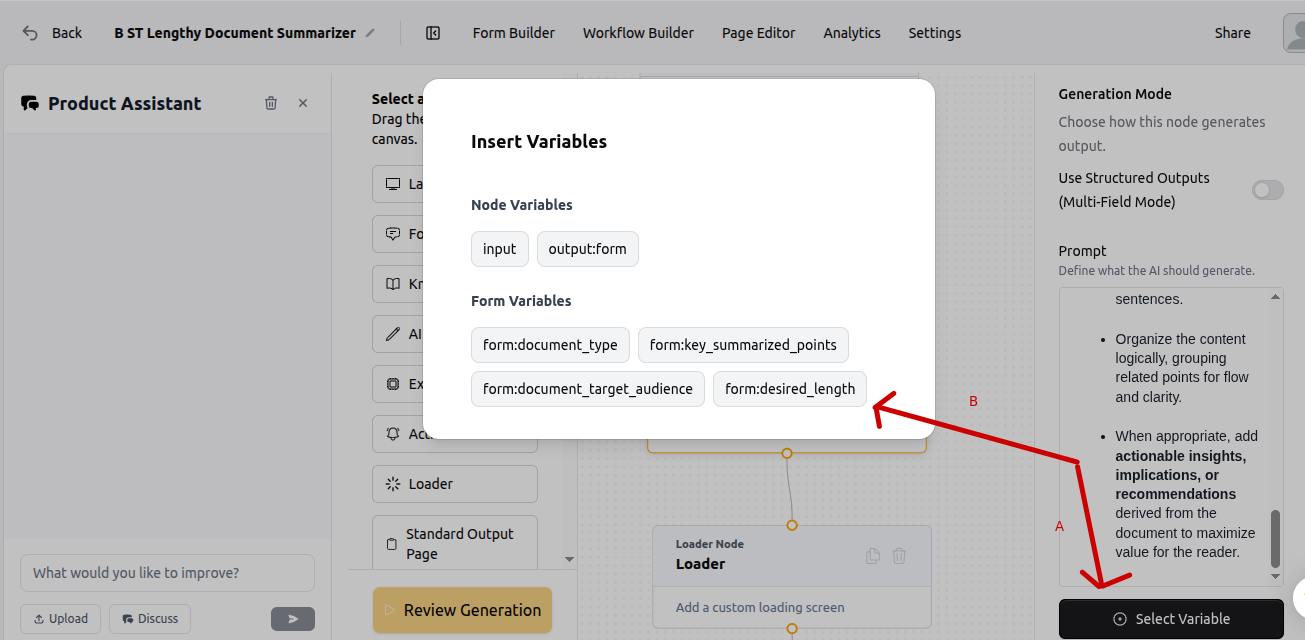
As you can see the form variables have been populated throughout the prompt. This is a simple prompt that includes role, input and output requirements.
To add the form variables to the prompt, simply insert them from the variable menu
Step 4: Add the loader node (optional)
It's definitely not a must-have but you may like to add a loader image for your audience to view while the product output is being generated. Drag the loader node onto the canvas, select it and then enter the loader manager to select your desired loader image.
Step 5: Add your standard output page
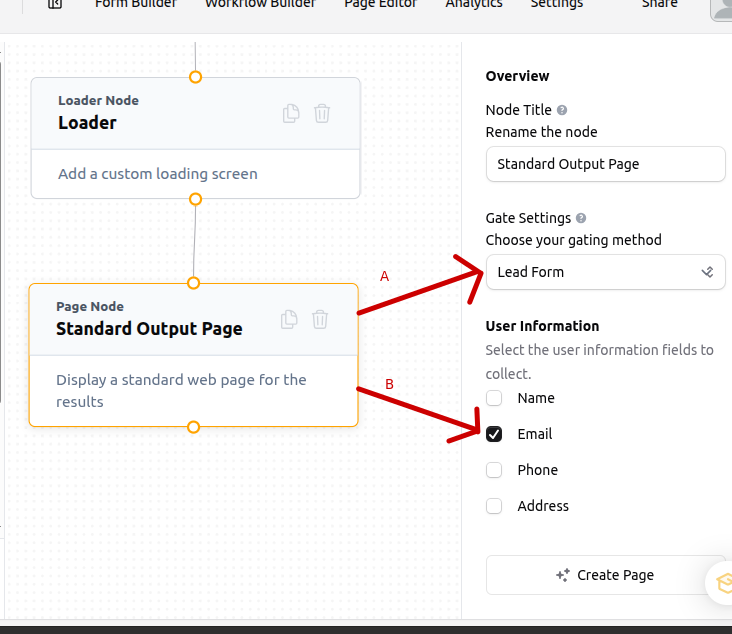
Select the 'standard output' node and drag it onto the workflow canvas. All you have to do now is select the node from the canvas and configure your desired lead capture action. For this example we will choose 'lead form' and 'email' as the actions. Do not select 'create page.' With standard output it's all created for you.
Step 6: Deploy the Product for Use
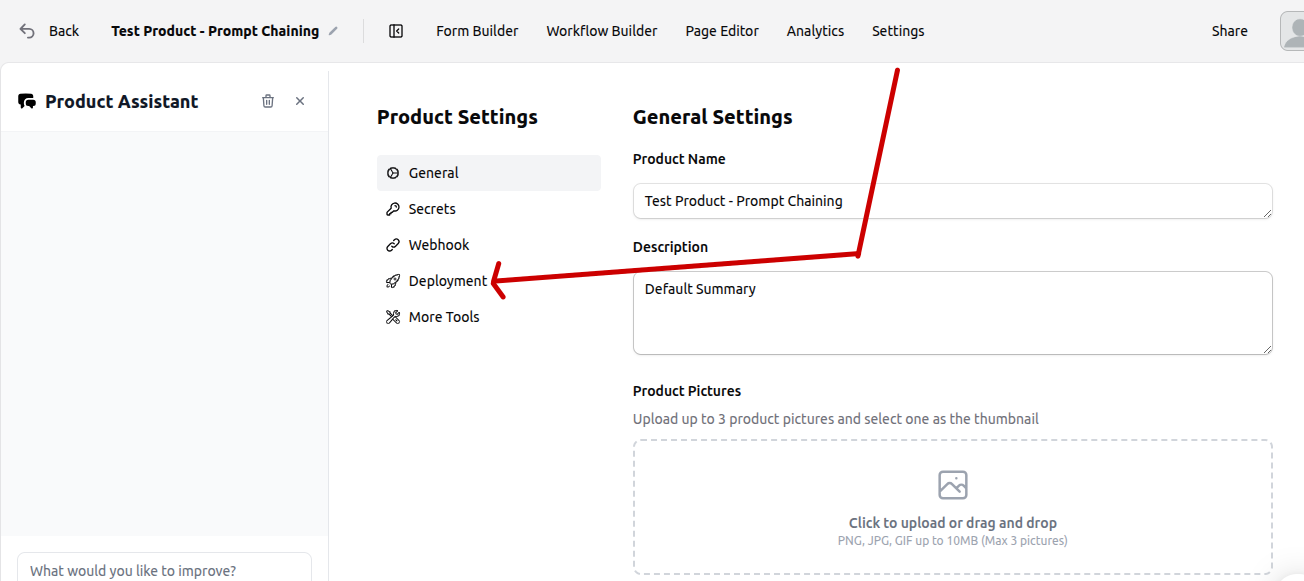
To deploy the product, navigate to your product's settings area, then select the deployment sub-menu and toggle 'publish product' to on. Please note that the product will not deploy if you have not created your landing page yet. You can then fetch the product deployment link from 'Domain and URL Settings'. To learn how to embed your product in your website or landing page please refer to our article on embedding your productised offering in a website.
That's it! You have now created your first AI product with standard output.
One final thing we should mention here, it's really straightforward for end users to copy the standard output and use it to their liking.